Getting to know your Settings Page
The Super Testimonial Settings page comprises of eight tabs namely:
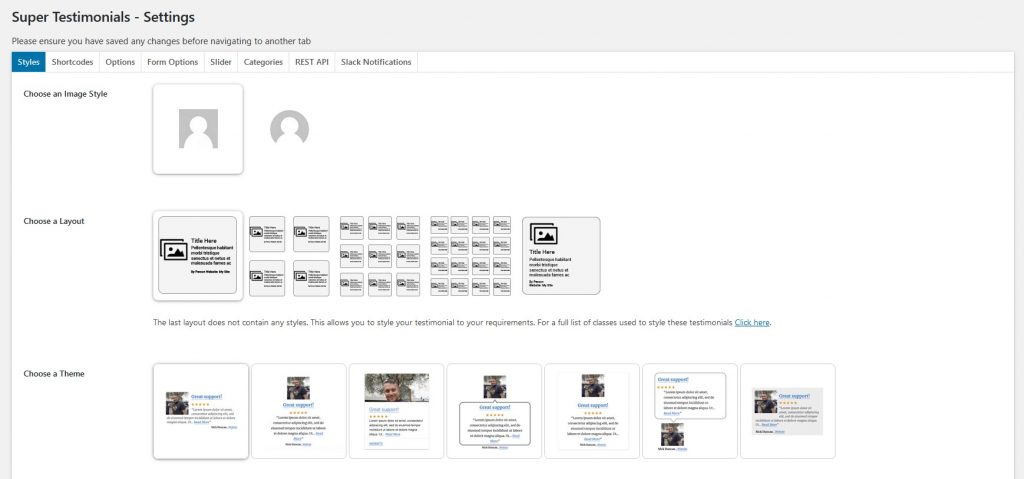
- Styles Tab (choose an image style, layout, theme and customise your testimonials)
- The Image style section allows you select between the two options – the default, which is displays a squared image or the second one which displays a rounded image.
- The Layout section provides a selection of five options – the default, which displays one column,the second option that displays two columns, the third option that displays three columns and the fourth option that displays four columns.
- The last option in the Layout section does not contain any styles, it allows you to to style your own testimonials layout to your preference.
- The Choose a theme section contains six themes.
- The last option in the Theme does not contain any styles, it allows you to to style your own testimonials to your preference.
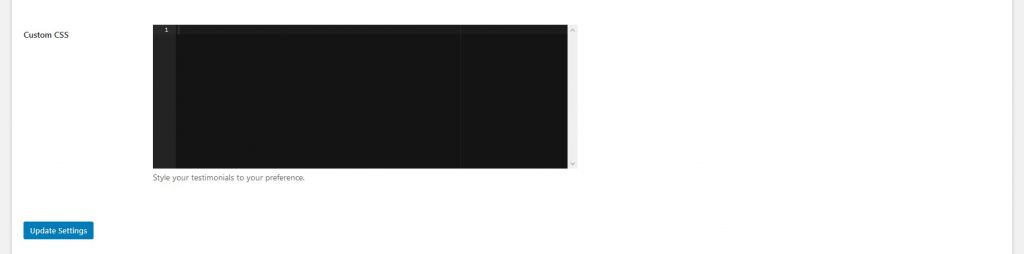
- The Custom CSS section provides a platform to style your own testimonials using CSS.
See below an illustration of the above.
NB! Please ensure you have saved any changes before navigating to another tab.
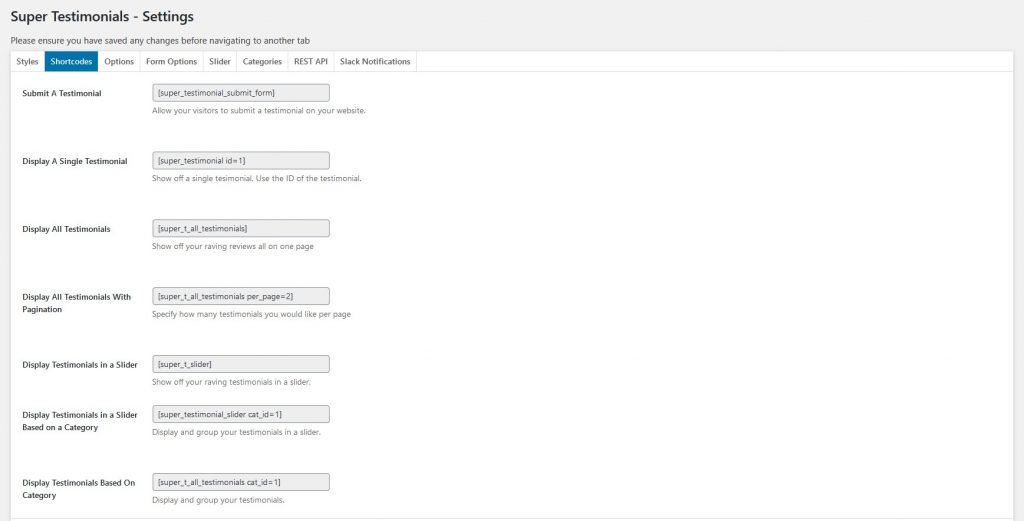
2. Shortcodes Tab (contains all the shortcodes you will need in the plugin.)
See below the shortcodes available in the Super Testimonial Premium Version plugin
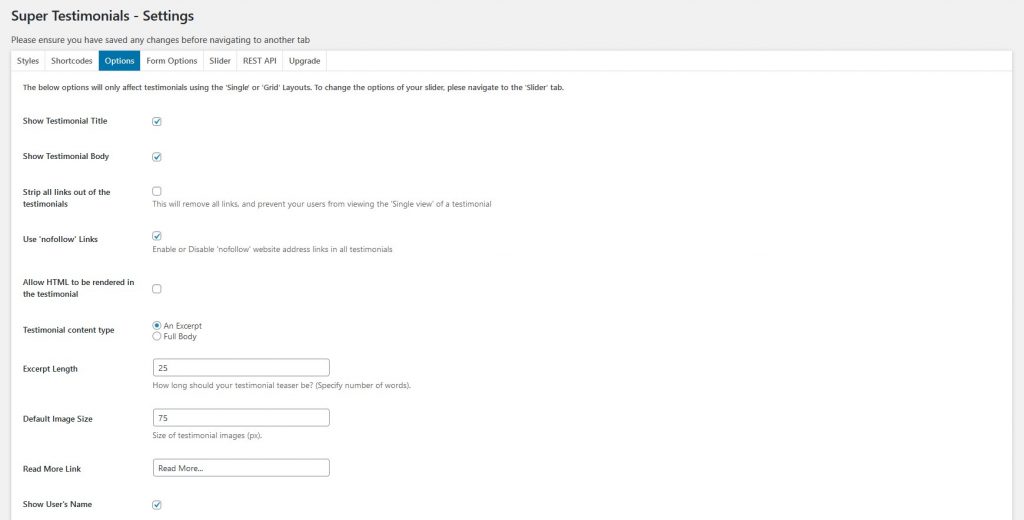
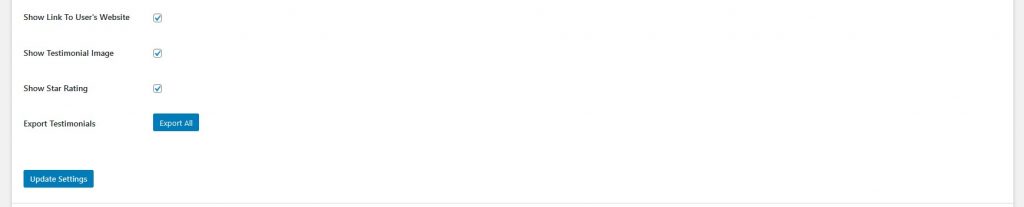
3. Options Tab (the below options will only affect testimonials using the single or grid layouts.)
- Allows you to show the testimonial title or not.
- Allows you to show testimonial body or not.
- Allows you to strip all links out of the testimonials.
- Allows you to set whether links are ‘nofollow’ links or not.
- Allows you to enable HTML rendering in the testimonials edit page.
- Allows you to specify the testimonial content type.
- Allows you to specify the excerpt length.
- Allows you to set the default image size.
- Allows you to customize your read more link.
- Allows you to show the users name or not.
- Allows you to show the link to the users website or not.
- Allows you to show testimonial image or not.
- Allows you to show star rating or not
- Allows you to export all testimonials.
See below an illustration of what is available in the Options Tab
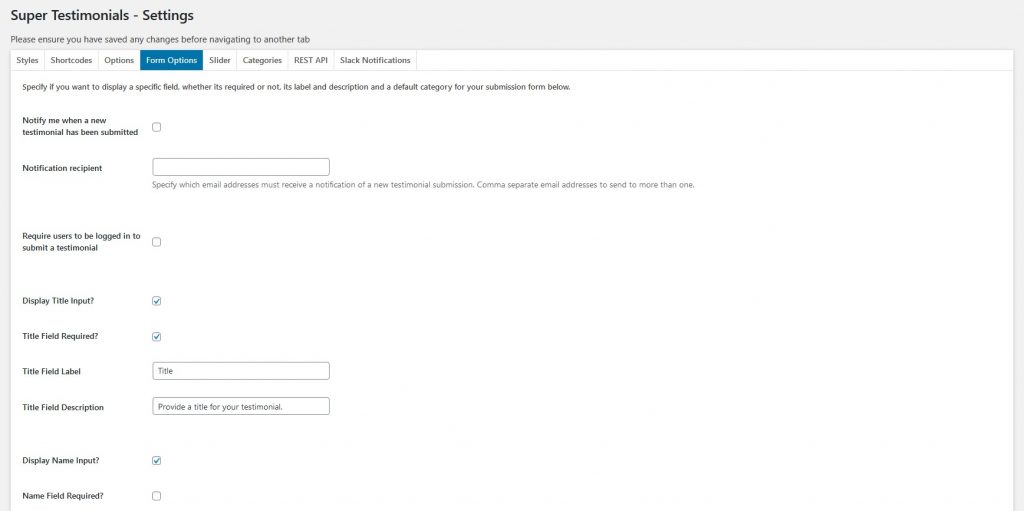
4. Form Options Tab(allows you to create a comprehensive form on your website)
- Notify when a new testimonial has been submitted.
- Notification recipient.
- Require users to be logged in to submit a testimonial.
- Display title input.
- Title field required.
- Title field description.
- Display name input.
- Name field required.
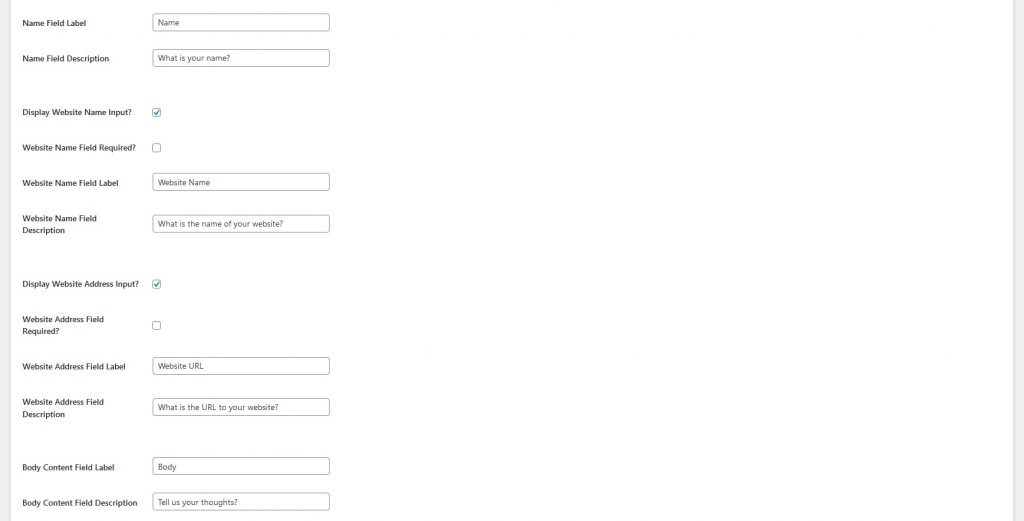
- Name field label.
- Name field description.
- Display website name input.
- Website name field required.
- Website name field label.
- Website name field description.
- Display website address input.
- Website address field required.
- Website address field label.
- Website address field description.
- Body content field label.
- Body content field description.
- Enable ratings.
- Rating field required.
- Rating field label.
- Rating field description.
- Enable CAPTCHA.
- Allows users to choose a category.
- Category field label.
- Category field description.
- Redirect page on successful submission.
- URL to redirect page

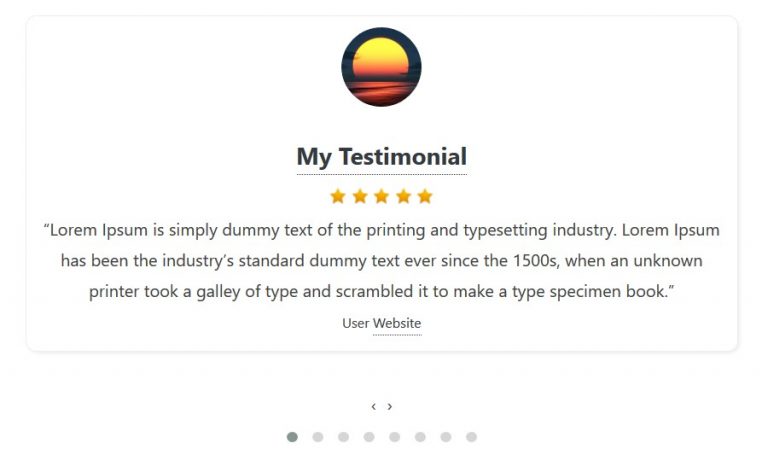
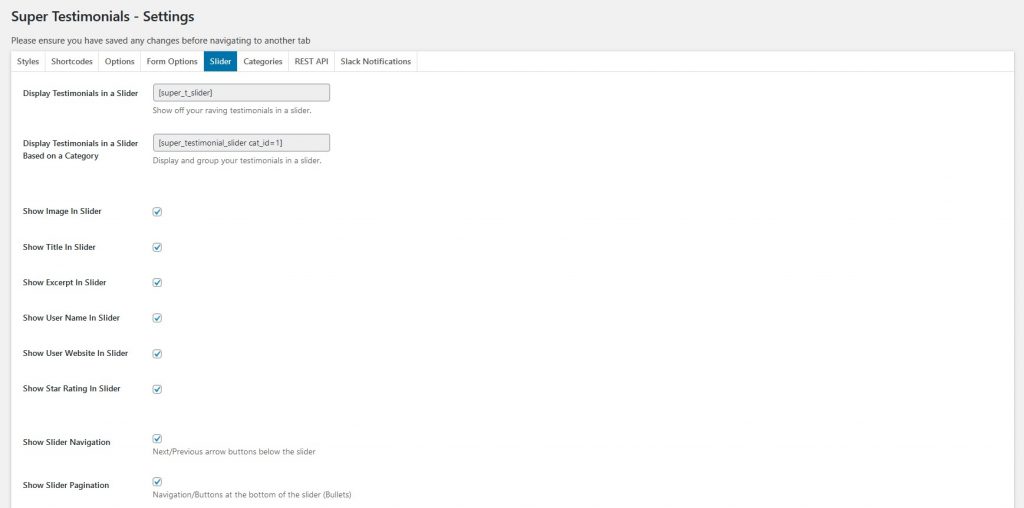
5. Slider Tab (contains options that enable customization of a slider )
- Enables you display sliders by using the shortcode – [super_t_slider] to display testimonials in a slider.
- Enables you to create testimonials based on categories using the shortcode – [super_testimonial_slider cat_id=1].
- Enables you to customize a slider to show images, titles, excerpts, usernames and website names.
- Enables you to specify the following:
- Slider Navigation
- Slider Pagination
- Number of testimonials per slide.
- And Finally,it enables you to modify the CSS to style of your own testimonial slider.
See below an illustration of the use of the slider.
6. Categories Tab(allows you to create and view all categories)
See below an illustration of the Categories Tab

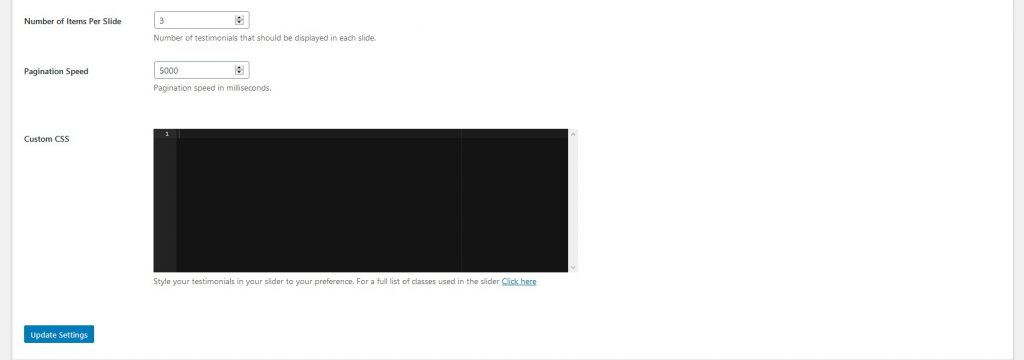
7. REST API Tab (contains more information about the REST API)
See below an illustration of the REST API Tab
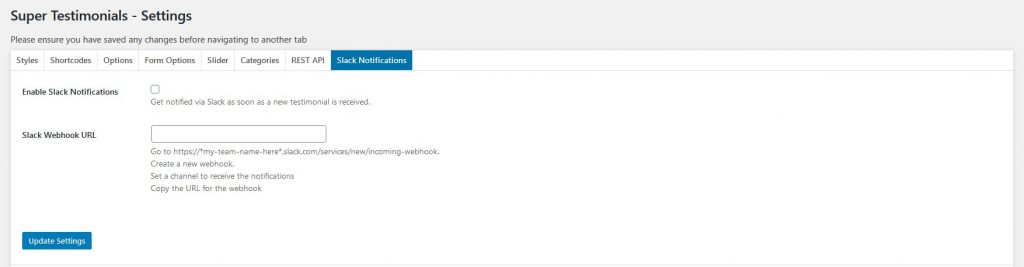
8. Slack Notifications Tab(allows you to set up Slack notifications)